
Evening
bloggers..well I promised some tut's and a lot of you have asked about
cloudy skies..now as I said before I'm no expert but I'm happy to share
how i do things ..grab a coffee and check out my step by step guide
:0)...
Step 1
hand
draw a cloud.. *TIP* I've used a letraset fine liner as it won't
bleed... if you don't have one pencil is best as some pens will run into
you promarker ink
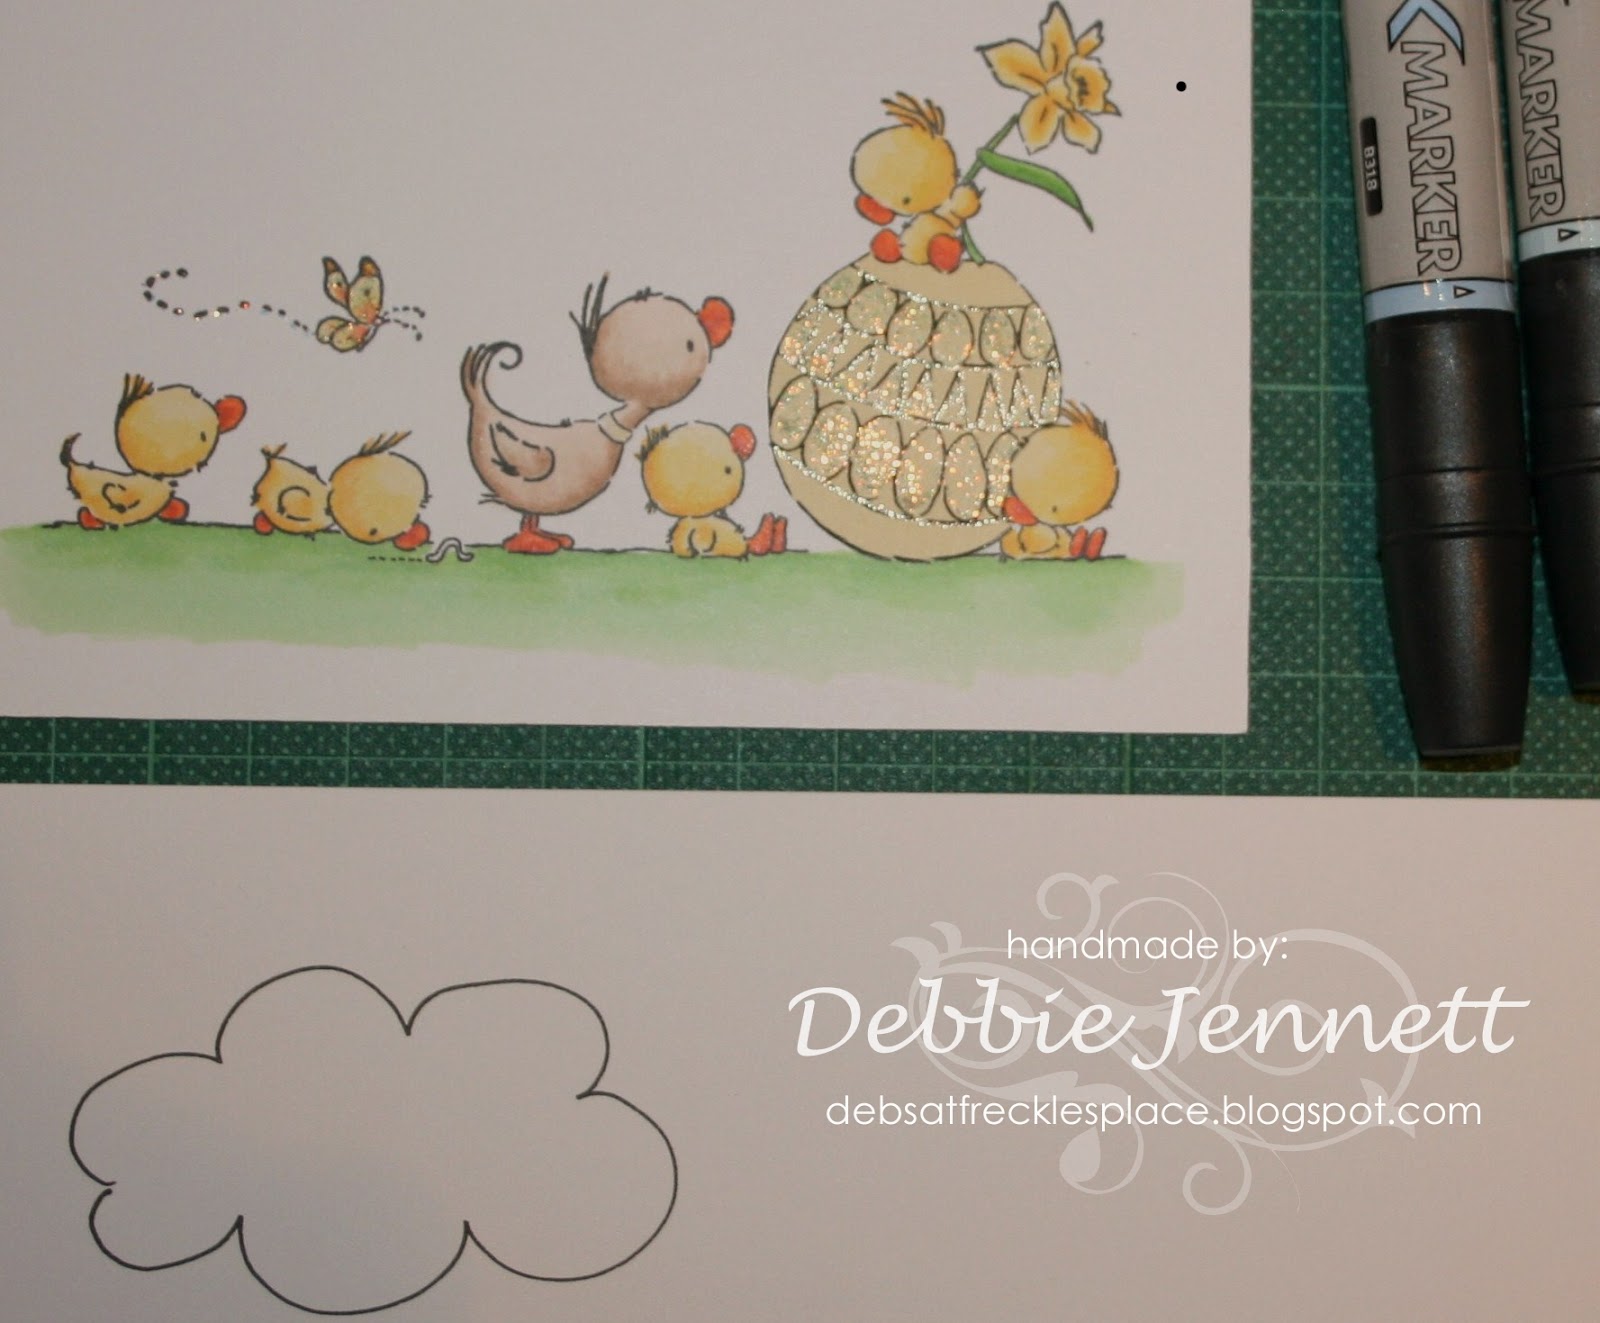
Step 2
choose
your markers..I've used Cloud Blue and Glacier Blue in the flex markers
but regular PM's work just the same you could try Powder Blue and
Pastel Blue :0)...

Step 3
Cut out your cloud..

you could try using more than one cloud...

or stick a couple together...remember there are no hard and fast rules..

*TIP*.. if your worried about your drawing ability you can always pick up some DP's and cut those out

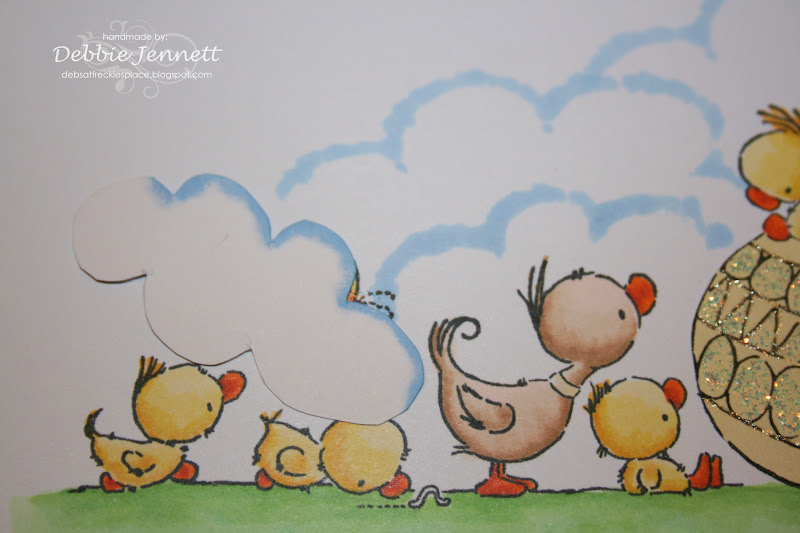
Step 4
Place your cloud over your image ..like so...

then
start adding your darkest colour...i just flick outwards...but not all
the way around ..only the top part...you don't have to be too neat with
this as it will be blended out later :0)

Step 5
Move your cloud to the next part of the image..being careful not to colour over it :0)

..it should look something like this...

Step 6
don't be afraid to flip or rotate your cloud it will make it less "samey" *word??
Step 7
continue until you have covered the entire area you wish to be cloudy :0)

Step 8
now start going
over the areas that have been coloured with your lighter colour just
extending either side..again it doesn't have to be precise :0)

when finished it should look a bit like this
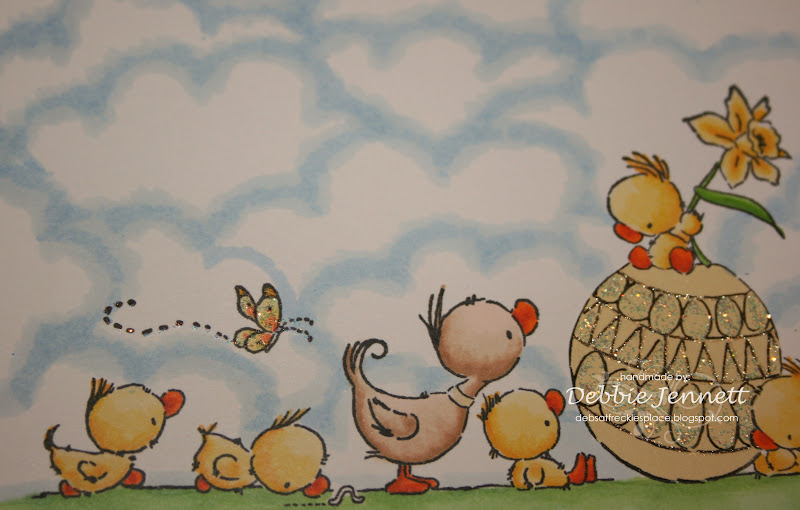
Step 9
go
over all of the sky with your blender pen..i start in a corner and work
around in circular motion with the chisel end...you should already
notice a difference

Step 10
Leave
to dry and if necessary go over a second time with the blender ..you
should then find you have a much softer looking background :0)..

well
that's it..hope you've found it useful..if there's anything else you
would like a tut on please let me know and i'll try to help....
Hugs Debs x
No comments:
Post a Comment